Stream Deck as a Productivity Tool
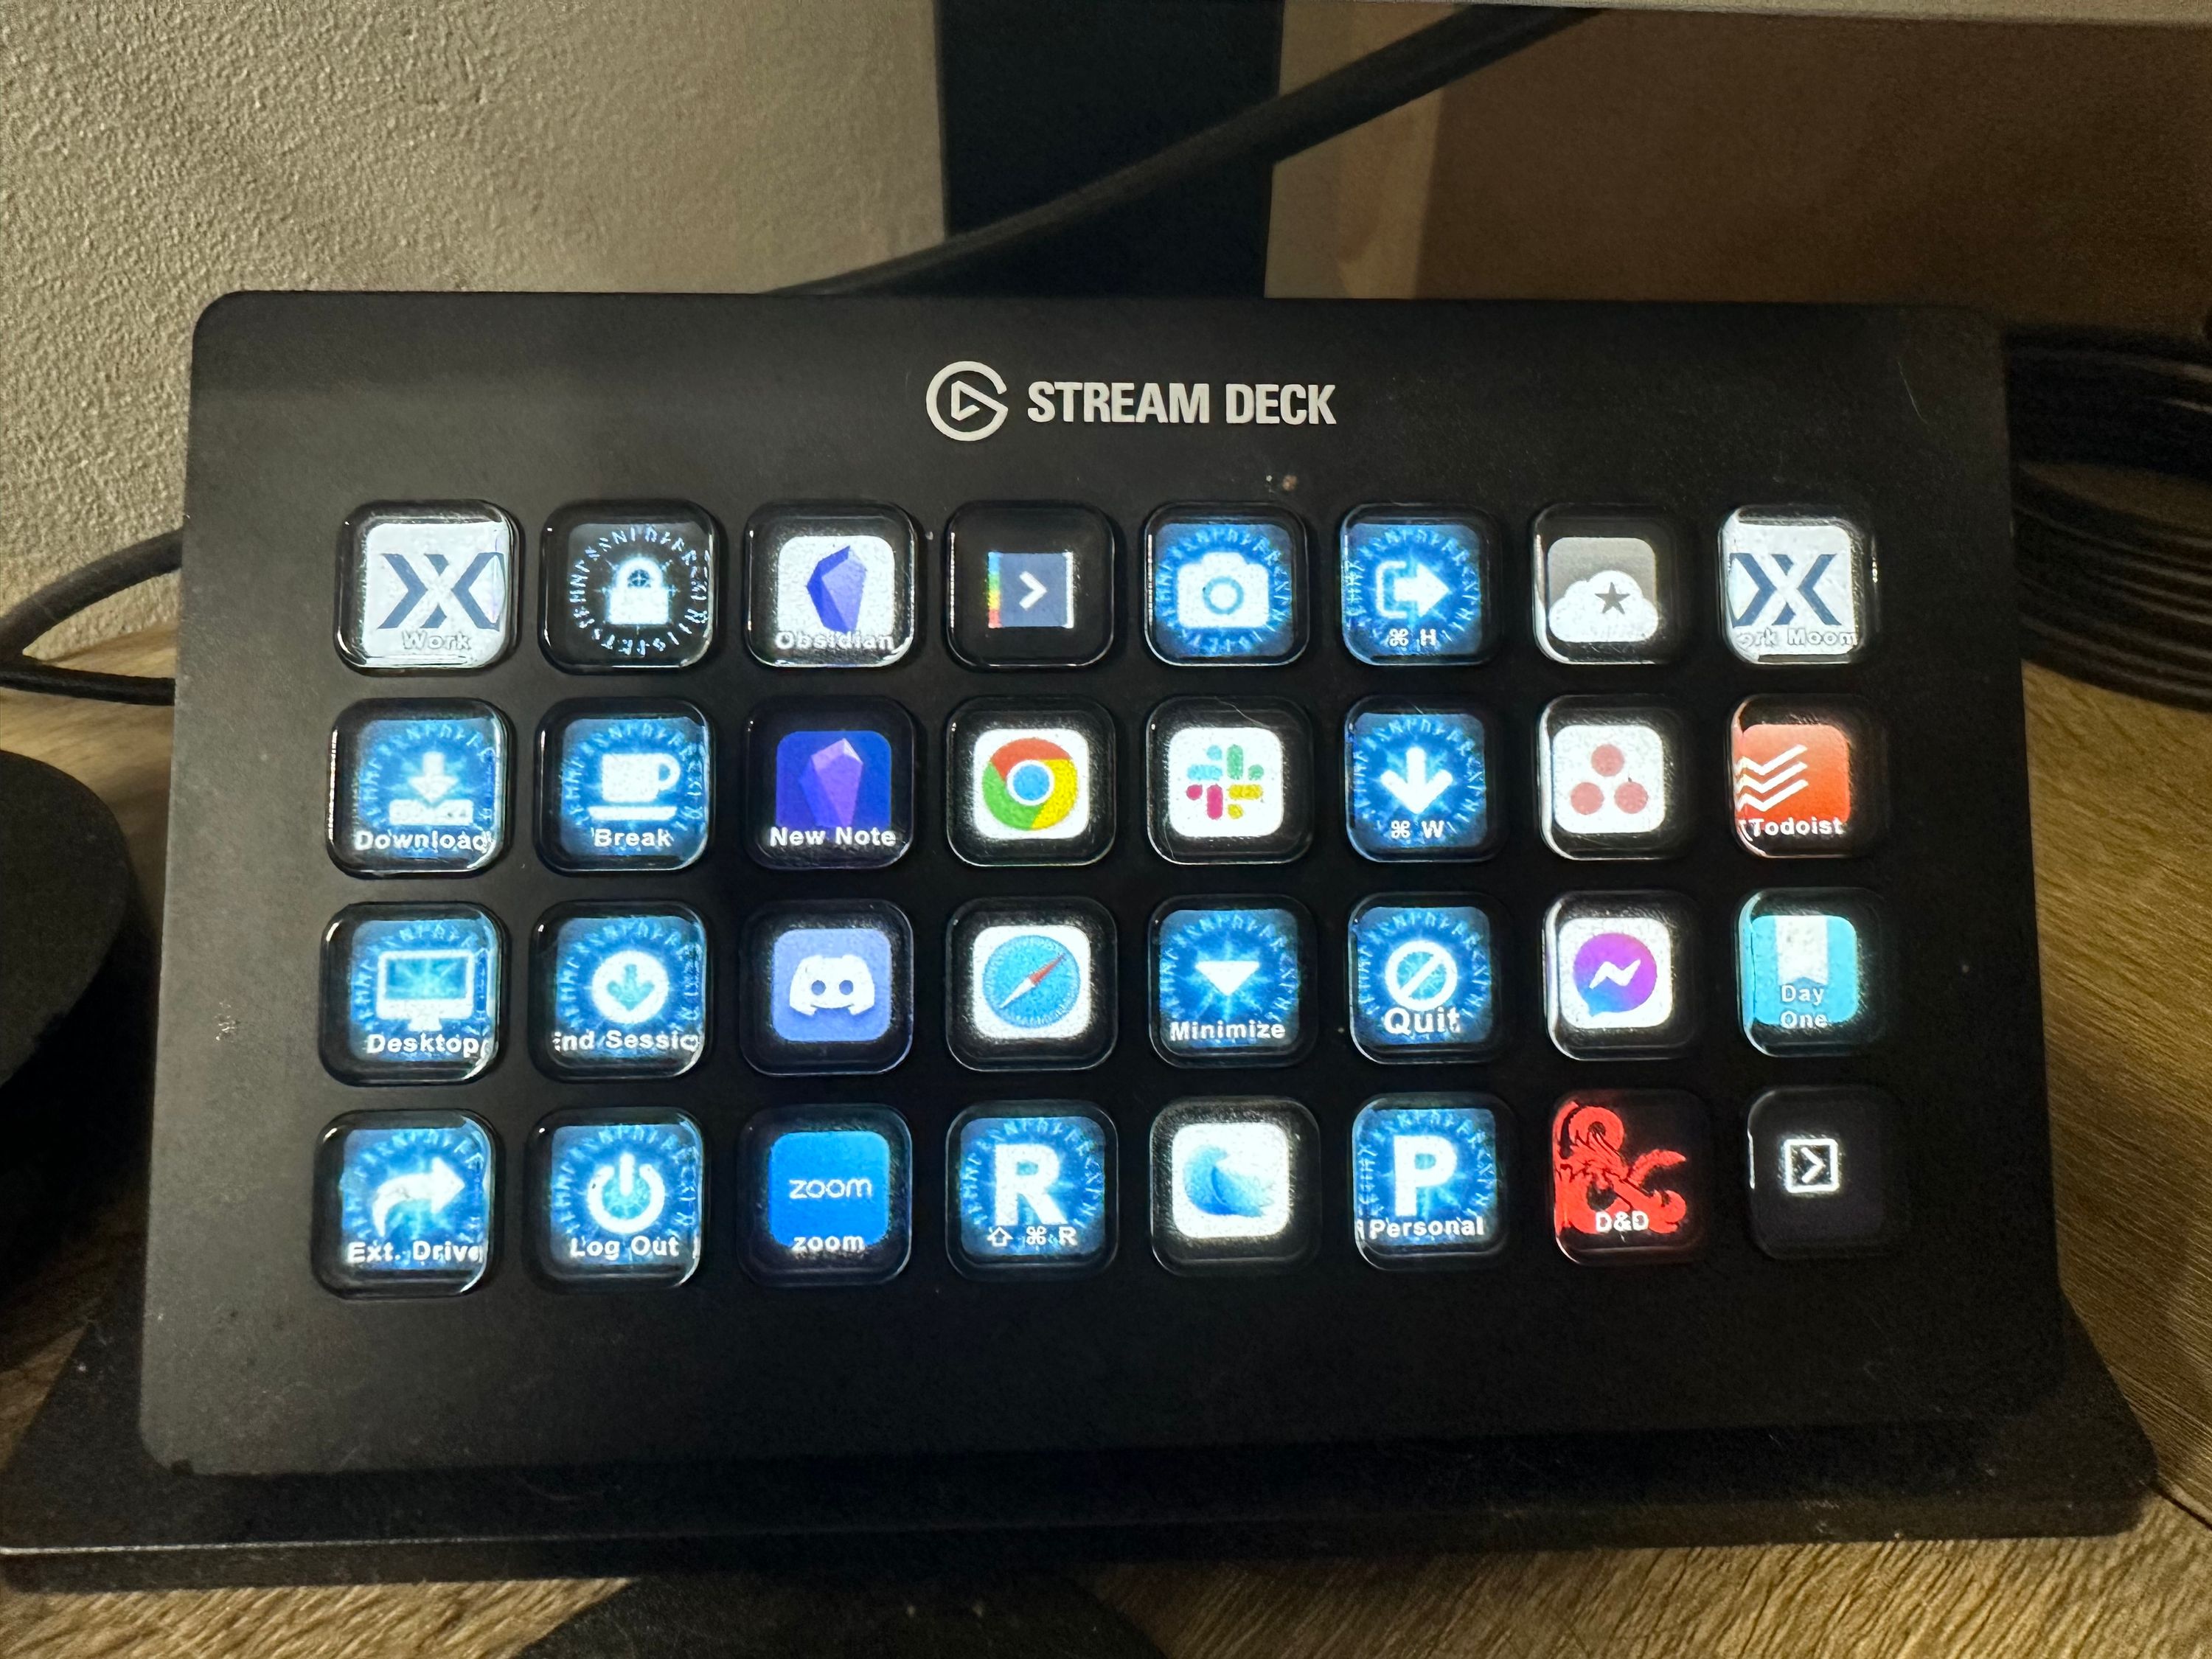 My Stream Deck Main Work Screen
Introduction
Before reading this article, I recommend you check out my Mac Automation article for a better feel for the software you can use to perform automation on the Mac. The software in that article is almost exclusively for the Mac and not available on the PC, but Stream Deck works on all platforms.
When I started my productivity journey, I dove into different types of software I could use to help me be more productive. I bought and learned about apps like Alfred, Raycast, Hazel, Keyboard Maestro, and Apple Shortcuts. I learned ways to make my Mac open all the apps I needed to do my work, write my blog, or play Dungeons and Dragons online. It saved me time, prevented me from forgetting things, and was fun.
But about a year ago, I started researching ways to make my work easier using hardware, and I discovered the Stream Deck. This little device has completely changed not only the way I work but also how I think about doing work.
A Stream Deck is a brand of macropad, which is a device that can have buttons, dials, and sometimes touchscreens. All of these can be programmed to interface with your computer to do all kinds of things (mine is the Stream Deck XL, which only has buttons but has 32 of them). It uses software for the Stream Deck itself that interfaces with your other apps to perform tasks like opening an app, turning down volume, changing lighting in the room, or pretty much anything else you could control from your keyboard and mouse.
The Steam Deck was created for streamers on platforms like YouTube and Twitch, allowing them to switch cameras, activate effects, etc. without looking away from the camera. But it’s also a great tool for almost anyone who uses a computer to pay for their shoes (credit: Mac Sparky for that one).
I use my Stream Deck for general productivity work. I have buttons and screens for executing macros, launching or bringing apps to the foreground, and changing settings on my system. I’ll give you some details later, but first, let’s go over some of the cool ways you can set up a stream deck.
Setting up a stream deck
When I first got my Stream Deck, 32 buttons seemed like plenty. I didn’t think I would use them all. But as I got more into automation, it became harder to remember all of the keyboard shortcuts I had created. Putting things on the stream deck gave me a visual way to remember what I could do.
There are a number of ways you can set up a stream deck, and you don’t have to pick just one. Let’s look at some of the ways you can organize it.
Folders
Folders on a stream deck work very similar to folders on your computer. To create a folder, you drag the “Create Folder” action from the actions list onto one of the buttons. Give the folder a name and icon, then double-click on it to enter the folder. You will now see a blank screen of buttons as if nothing was on your stream deck, except for the top left button having an “up” arrow, which takes you back to the main screen that is “above” the folder. You can also put a folder on a folder screen, allowing you to drill down like you would on your computer.
When I first got my Stream Deck, I created a bunch of folders as categories and placed actions in the folders. It created great organization, but I found myself making too many button presses to get to the action that I wanted.
However, I recently found another Stream Deck action that makes folders more useful. When you create actions inside a folder, you can assign one action to the button, or you can assign a “Multi-Action.” This is not really an action in itself but a container for placing several actions that will happen one after the other, like a macro. Inside this multi-action, you first drag in the action you want to happen, then add the “Switch to Profile” action underneath it in the list. Once the other actions assigned to the multi-action are complete, the Stream Deck will switch back to the profile assigned; no button pressing is needed to get out of the folder. Keep reading for more information on profiles.
Here’s an example: When I need to take a screen shot, I push a folder button that takes me to a list of multi-actions for different types of screen shots (area of screen, whole window, whole screen, scrolling, and text OCR). These buttons are “hotkey” buttons, meaning when you create them, you tell them what keyboard shortcut you want them to press for you. When I push any of those buttons, it either takes the screen shot or gives me the crosshair to select the area, then switches the Stream Deck back to the first screen of my work profile, so I don’t have to press a button to get out of the folder.
One more folder example Sometimes I need to resize and move a window to another screen. I have a folder with options for resize, move, and move and resize. All of these actions are done through keyboard shortcuts in Raycast. The problem is that I have to first hit the Raycast shortcut to call it up, then hit the keyboard shortcut I have assigned for the resize or move. If I am doing both, I have to activate Raycast, activate the first action, open Raycast again, and activate the other action. I automated this by creating a folder with multiple actions. I click the folder, then click on a button for one of the three choices I want. The multi-action runs through the keyboard shortcuts for me, then uses the switch profile action to take me back to the right screen of Stream Deck buttons.
Multiple Screens
Another way to organize your stream deck is by extending the set of buttons with a “next button.” To do this, drag a “Next” button onto one of the buttons of your stream deck, such as the bottom or top right corner (but anywhere will work). When you press it, everything on your screen “slides” to the left, and you have a new screen of blank buttons. On this screen, you should put a “Previous” button (I use the bottom left corner, but just like with the “Next” button, any button will work) so you can get back to the previous screen.
I use this method a little bit, but it still presents the problem of having to press around to get to the action that you want.
Profiles
This is my preferred method of organizing. A profile is like a shortcut to a screen that appears depending on which app is in the foreground, with that screen displaying buttons you want to use when that screen is active. For example, whenever I push my Slack Stream Deck button, it displays a page I created with buttons for various Slack channels in my main account, buttons for my most used DMs, and buttons to switch to other Slack accounts that I am a guest in.
I love this method because when I push an application button on my Stream Deck, it brings that application up on my Mac and instantly displays a group of buttons I need for that specific application and nothing else. If I push an application button tied to a different profile, it brings up that app and shows me buttons for that application.
As an example, here is my profile screen for the note-taking app Obsidian:
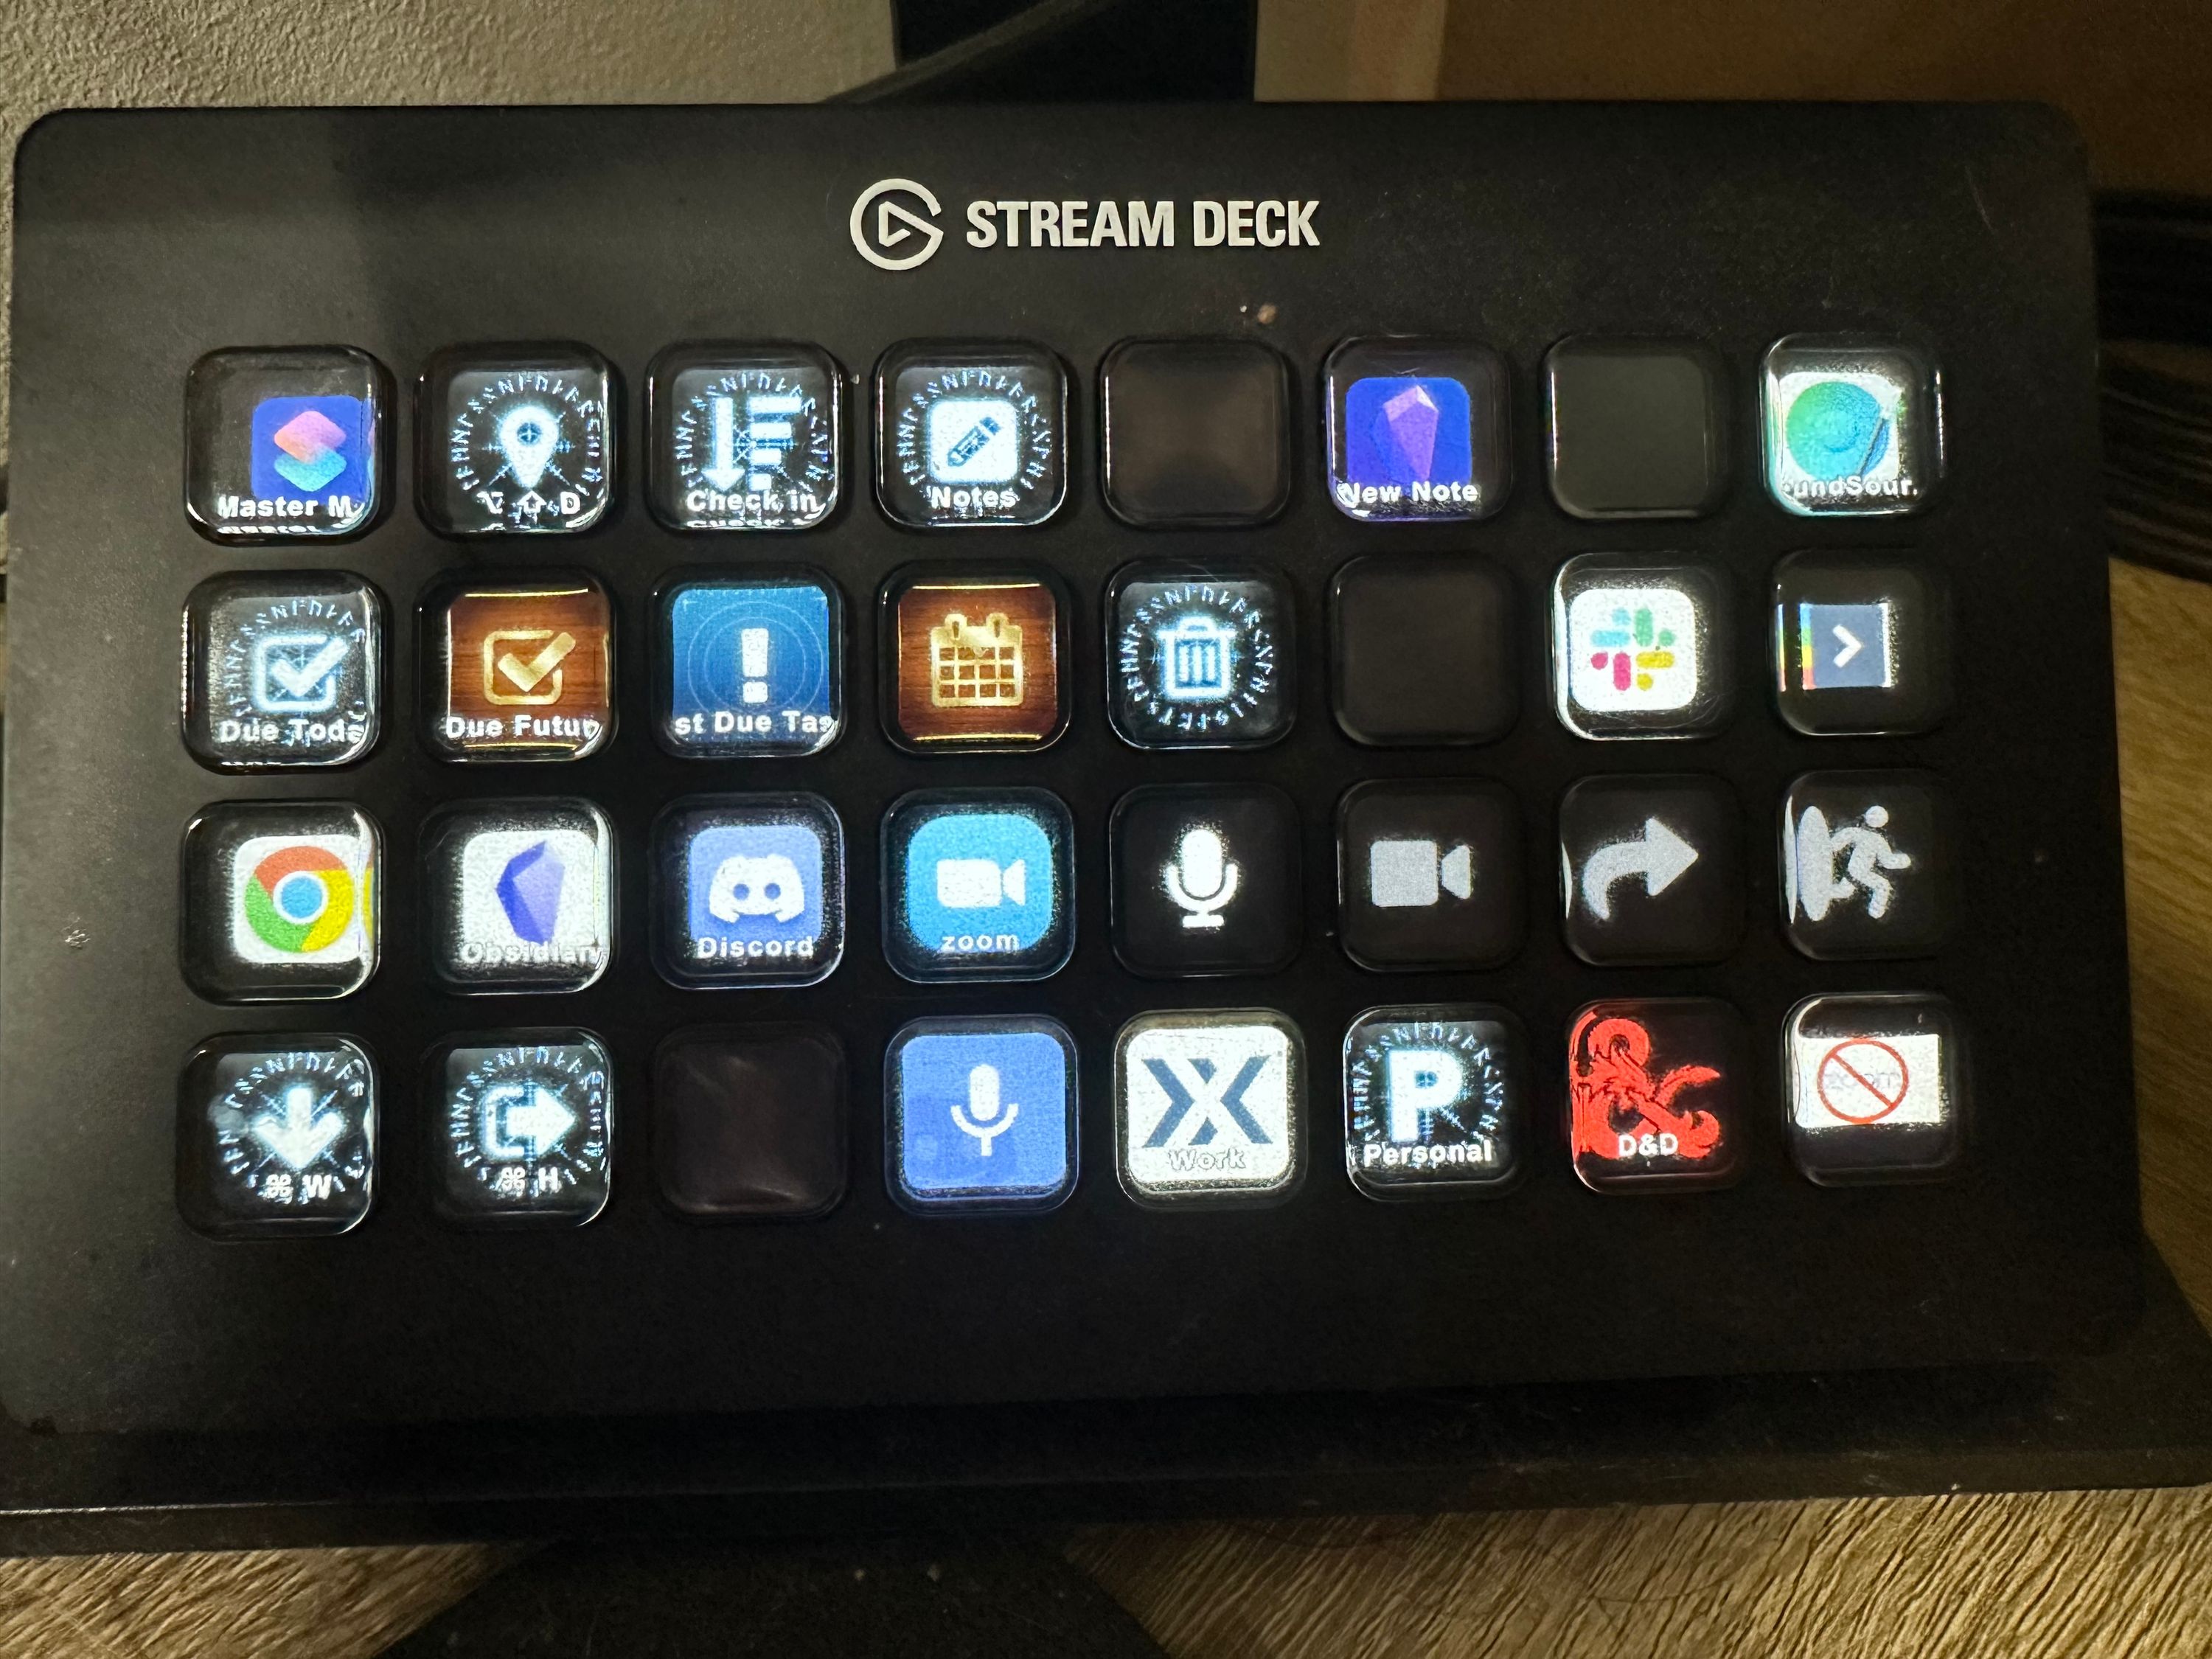 Stream Deck Obsidian Profile
You can see in this shot that in the top left I have a bunch of buttons for commands in Obsidian, such as creating a new note or a check-in note. I also have buttons for some other apps I use while using Obsidian (the microphone and video buttons are for muting my audio and turning off my camera during a Zoom meeting, which is from a Stream Deck plug-in).
How to Use a Stream Deck for Productivity
If you have already read my Mac Automation article, you have learned about many of the ways I use automation to increase productivity. I purposely left out how I do it with a stream deck so I could cover it here after explaining about the stream deck itself. Now that I’ve done that, let’s talk about how I incorporate the Stream Deck into my workflow.
App buttons
These are some of the simplest buttons, but they are very helpful. Using the “Open” action, you can launch an app or bring it to the foreground. This is a helpful way to jump between apps. When you drag this action to a button and select the app to open, it automatically uses the icon of the app for the button, so you don’t even need to assign an icon to it (unless you want to change it to something else). Also, as previously mentioned, this is a great way to switch profiles on your stream deck.
Website buttons
These are similar to the app buttons, but they are designed to take a URL instead of choosing an app. You can add the URL of any website you use regularly to get quick access to it. You can also use these buttons for URL schemes in apps that use them. For example, if your to-do list app creates a URL for each project, you could assign that URL to a button so you could jump into that project instantly.
I use this button a lot for Slack. Every channel and profile in Slack has a unique URL, which contains a code for the Slack team and a code for the individual channel or profile. If you log into Slack in the browser, you can find both of these codes and use them to create a link. Here’s a support document from Slack that explains it way better than I could: Reference: Deep linking into Slack
Once you have the link, you can add a website action to a button with that link. Use an image on the button that reminds you of what it is for, and then when you press the button, it will take you to the proper channel or DM in Slack. In my case, we have different channels for each company that is a customer. So I used the company logo for the button. For DMs with co-workers, I use a copy of their Slack profile picture. This can use up a lot of buttons, so I also created a Slack profile. When I click on the Slack button, it brings the app to the foreground and shows me the Slack profile with all the Slack-centric buttons.
Set ups
My favorite buttons are the ones for setting up. Setups are macros that set your system up to do a particular type of work, such as opening all the apps you use to do your job, opening up your apps for editing video and closing everything else, etc. The main app I use for this is Keyboard Maestro, which can open apps and integrates Apple Shortcuts and Apple Script to do things it can’t on its own. I use a Stream Deck plug-in called KM Link to add the buttons. Once you add the plug-in from the Stream Deck store built into the software, you just drag a KM Link action to a button and select which macro you want it to run from the drop-down menu.
When I push the button to start my workday, the macro runs an Apple Shortcut to make sure my audio input and output are assigned to the correct sources. It then opens all my apps in quick succession. Then an Apple script runs to tell Moom to place the apps in the positions assigned for the work snapshot. Finally, it runs Shortcuts to start playing my favorite concentration sound from Dark Noise and put my devices in work focus mode. I know it’s finished and ready to go when a final Apple script tells me audibly that it’s time to get to work. All of this is done with one button press. It’s important to note that Keyboard Maestro also has quit app functions, so I also have buttons that close all or some of my apps, put my Mac to sleep, or log it out.
So, as you can see, there are a lot of ways to set up your Steam deck for productivity. It has made a huge difference in my workflow because I often find it easier to reach above my trackpad and press a button, but it also brings me a bit of delight because it’s fun to make something happen on my Mac by pushing a physical button instead of typing or using the trackpad. It’s also much easier to look at the pictures on the keys instead of trying to remember all the keyboard shortcuts.
Do you use a Stream Deck or other type of macropad? How do you use it? Do some bragging or leave tips in the comments.